
How To Install An Electric Shower: A Step-by-Step Guide
Installing electric showers is one of my most frequent jobs as a professional electrician. Homeowners often want to upgrade to an electric shower for the convenience and energy savings they provide. While it’s best to have a certified electrician handle the installation, some handy homeowners still want to do DIY.
That’s why I’ve created this comprehensive guide on safely installing an electric shower in your home. Follow these steps below, and you’ll enjoy hot showers in no time!
Key Takeaways:
Installing an electric shower is a complex project, but it’s manageable for an experienced DIYer by following this process:
– Select the right electric shower model for your budget, space and electrical system.
– Make necessary electrical upgrades like installing new circuits to power your shower.
– Prep the installation area by removing old shower fixtures and shutting off water and power.
– Follow all directions for safely mounting, plumbing, wiring, and connecting the new electric shower.
– Verify waterproofing and electrical connections before use.
– Finally, caulk, seal, replace tiles, and enjoy your instant hot water!
While it’s not the easiest DIY, installing your own electric shower saves on professional installation costs. Just take it slow and get help if needed.
I’m always happy to answer any other electric shower questions for my customers in the Coventry area. Reach out anytime!
What is an Electric Shower, and Is It Right for You?
Before going over the installation process, let’s review what an electric shower is and if it’s the right choice for your home:
– Electric showers heat water instantly using an electric element, unlike traditional showers that use your home’s hot water system. This means you get unlimited hot water.
– They connect directly to your cold water supply and electricity, so they can be installed anywhere in your home without needing access to your existing hot water heater.
– Electric showers are energy efficient – they only heat the water you need as you’re using it, rather than heating and storing tankfuls of water.
– Installation is relatively straightforward as long as you have a dedicated electric circuit for the shower.
I always recommend electric showers to my clients who want to remodel an older bathroom or install a shower in a part of their home that doesn’t have existing hot water lines. They provide hot water on demand without needing a costly plumbing overhaul.
Now, let’s get into the installation process!

Choosing the Right Electric Shower
Your first step is picking the right electric shower unit for your bathroom space and needs. As a Coventry electrician, the brands I recommend most are:
– Triton
– Mira
– Bristan
These companies make high-quality electric showers that will last for years.
When selecting a model, here are some key factors I advise my customers to consider:
– Flow rate – Standard electric showers have flow rates between 6-10 litres per minute. Higher flow rates give you more water pressure but use more electricity.
– Power rating – Check the power rating to ensure it works with your home’s electric system. Common ratings are 7.5kW, 8.5kW, 9.5kW, or 10.8kW.
– Adjustable temperature/pressure settings – Look for a model with multiple heat and flow settings to customize your shower.
– Special features like LED temperature displays, timers, anti-limescale filters, etc.
– Budget – Prices range from £100 for basic models up to £500+ for premium electric showers with more features and settings.
Once you’ve selected the suitable electric shower, it’s time to check if your home’s electrical system can handle it.
Checking Your Electrical System
The most crucial part of installing any electric shower is ensuring your home’s electrical system can handle the load. Here are the key electrical considerations:
– A dedicated circuit is required – You cannot plug an electric shower into a shared circuit or bathroom outlet. It’s best to install a new circuit just for the electric shower.
– Analyze if you have adequate amperage – Entry-level 7.5kW showers need 30 amp circuits. More powerful showers need 40, 45, or 60-amp circuits. Check your fuse box to see available capacity.
– Hire an electrician if your box needs upgrades – If your home’s electrical panel can’t handle the shower’s needs, hire a certified electrician like myself to install a new circuit with adequate amperage. Attempting electrical upgrades yourself is extremely dangerous.
Before purchasing your electric shower unit, I visit clients’ homes to assess their electrical systems. This ensures the product they choose will be compatible and safe once installed.
Pre-Installation Preparations
Okay, you’ve bought the perfect electric shower – now the fun part begins!
Here are my recommended steps to prepare for installing your new electric shower:
Tools You’ll Need:
– Tape measure
– Level
– Screwdriver
– Drill
– Adjustable wrench
– Pipe cutter
– Utility knife
– Wire strippers
– Electrical tape
– Teflon tape
Other Preparations:
Turn off the water supply using your home’s shut-off valve. This avoids leaks during installation.
– Shut off the power supply to the bathroom at your consumer unit. Safety first!
– Measure the height you want the shower mounted and mark the wall studs.
– Have all your supplies ready – plumbing pipes/fittings, waterproof backerboard, etc.
Now it’s time to remove your old shower fittings.

Removing the Old Shower
If you’re replacing an existing shower rather than installing it in a new location, start by:
– Removing the old showerhead, arm, taps, and hardware.
– Disconnecting and capping off any old plumbing connections.
– Taking down surrounding wall tile or backer board to access the wall studs and plumbing.
– Checking for hidden water damage or mould – repair any wall issues before installing a new shower.
– Verifying the location of existing electrical and water lines.
Once the old shower is removed, turn off the water supply lines and power supply to that part of the bathroom. It’s ready for your new electric shower!
Installing the New Electric Shower Unit
Here comes the most technical part – safely mounting the new electric shower components. Follow these steps:
Shower Mounting Bracket:
- Mark holes for the bracket on your prepared wall area at the desired height.
- Drill holes and insert wall anchors if attaching to drywall instead of studs.
- Attach the mounting bracket using provided screws. Make sure it’s level!
Plumbing Connections:
- Attach flexible water supply lines from the shower unit to your home’s main cold water line.
- Use compression fittings for a secure, leak-free connection.
- Apply plumber’s tape to pipe threads to prevent leaks.
Electrical Connections:
- Run wiring from the new circuit breaker to the electric shower location.
- Follow all local building codes for safe wire routing.
- Connect the hot, live, neutral ground wires to the shower’s terminal block. Double-check connections!
Attaching the Shower:
- Slide the electric shower unit onto the mounting bracket.
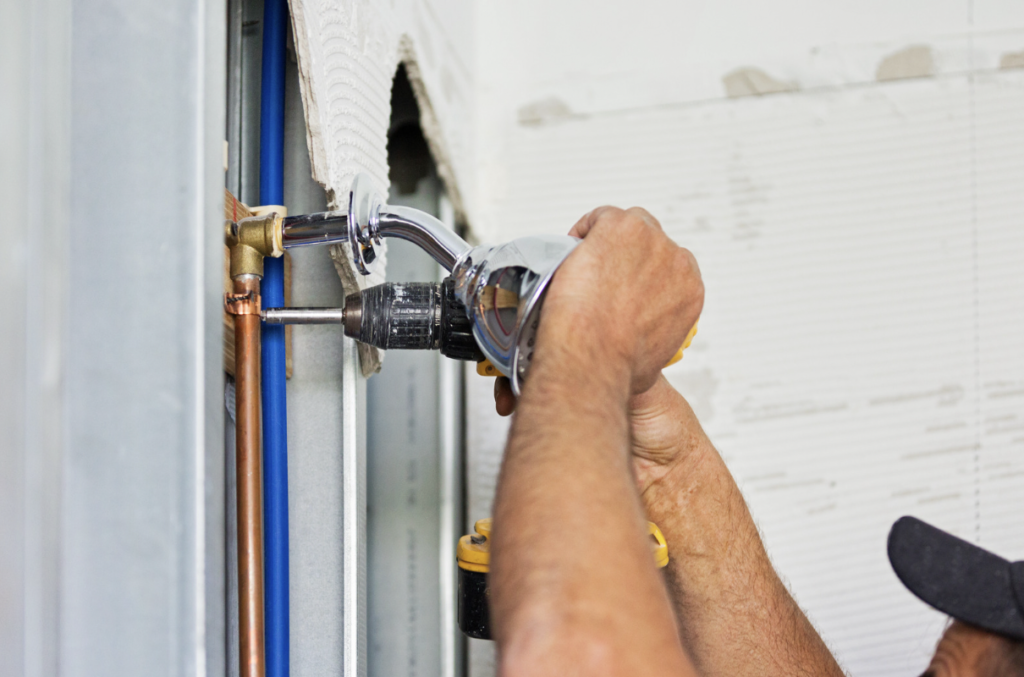
- Attach the adjustable shower arm and shower head.
- Connect the unit’s plumbing and electrical lines.
Almost done! Now it’s time for the most critical step…
Connecting the Electricity:
- Do NOT turn on the electric shower until you verify proper electrical connections! As a professional electrician, I’ve seen improper wiring cause fires and severe injury.
Here are safe steps for connecting power:
- Install a dedicated RCD or GFCI circuit breaker for the electric shower circuit. This will instantly break the circuit if there are any ground faults.
- Verify the hot, live, neutral and ground wires are securely connected to the shower’s terminal block in the right locations. Double-check with a voltage tester.
- Check for any stray wire strands or loose connections and fix them before turning the power back on.
- After triple-checking the connections, turn the power back on at the breaker box.
- Turn on the water supply and check your new electric shower!
The Finishing Touches
You’re so close to enjoying your new electric shower! Follow these last steps to complete the installation:
- Test the shower for leaks and ensure it turns on and off properly. Adjust the temperature setting to your preference.
- Seal up any holes or openings in the shower walls with silicone.
- Replace any surrounding wall tiles, backer boards, or enclosure panels.
- Caulk along the edges of the shower unit for a waterproof seal.
- Allow 24 hours for plumbing sealant and caulk to fully cure before using the shower.
- Verify water temperature and pressure at first use – adjust as needed.
Finally – it’s time to relax and enjoy your on-demand hot showers! The peace of mind of having a professional electrician install it is worth every penny. But hopefully, this DIY guide gives you an excellent overview of the entire electric shower installation process.
Frequently Asked Questions about Installing Electric Showers:
Learning new DIY skills comes with a lot of questions. Here are some helpful answers to common electric shower installation FAQs:
How Difficult Is It To Install An Electric Shower?
The installation process is moderately difficult, but ensuring your electrical system can handle the electric shower is the hardest part. I’d rate this project an 8 out of 10 for difficulty. Calling a pro electrician is your best bet.
Can I Install An Electric Shower Myself As A Beginner DIYer?
If you have some plumbing experience and are very careful with electrical connections, an experienced DIYer can self-install a shower. But, water damage or electrical hazards are risky if done incorrectly.
What Type Of Circuit Breaker Do I Need For An Electric Shower?
It would help if you had a dedicated single-pole RCD circuit breaker rated for the shower’s amperage needs. Standard sizes are 30, 40, 45, and 60 amps. Check your shower manual for electrical specs.
How Do I Adjust The Temperature On My New Electric Shower?
Most models have buttons or dials to set your desired water temperature. Test different heat settings when installing it to find your preferred showering temperature.
How Do I Maintain My New Electric Shower?
Follow the manufacturer’s directions for cleaning the filters and shower head. Avoid abrasive cleaners. Also, have an electrician annually check the electrical connections for corrosion.
